
Lately I have been on a roll with Christmas projects. I have slowly been “winterizing” my house with flocking and trees all over the place! I have also been crafting away at some DIY Christmas ornaments to add to the my newly themed tree this year!
As you may already know, I am incorporating a lot of neutrals this year, and in addition to my flocked tree I am slowly adding lots of new DIY ornaments. Recently, I shared how to make these STAMPED WOOD BLOCK ORNAMENTS and today I am showing you a completely new type using mod podge, ribbon, a printable and a wood block square.

Start by drilling holes in each of the top corners of your 6x6 square.

Then, align your sqaure on top of your printable, trace and cut. Get your own printable HERE

Then using a paint brush, simply apply a thin coat of mod podge directly to the surface of your wood before pressing your cutout onto the adhesive.


For good measure I applied another thin coat of mod podge directly over the top of the paper and allow to dry. Small bubble underneath the surface of the paper will appear during this step. Don’t worry, this is normal. They will flatten out as they dry!

Once your ornament is dry it is time to work some magic with your sandpaper. I liek to sand the edges first and foremost then I add some minimal distressing across the middle and over the print. How much or how little you wish to apply this process is completely up to you!

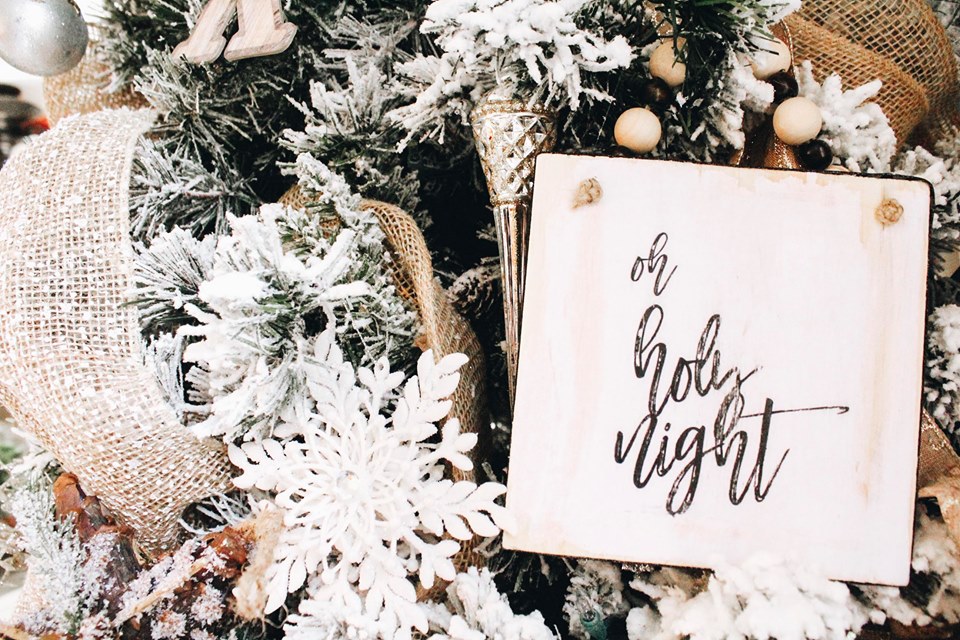
Once you have distressed to your liking, it is time to add a hanger to your new ornament! Simply threat and knot one end of some jute twine through one of your holes at the top. Thread your beads onto the jute and knot on the other side, forming a hanger.


Initially I had planned for this project to be complete after making the hanger, BUT THEN.…I thought not Christmas ornament would be complete without at least a small bit of buffalo check…am I right? To add just the perfect touch I dressed up the edges with some buffalo check ribbon from HOBBY LOBBY. This is the perfect opportunity to add your own flair to your ornament! I lined up the edges of my ribbon to the front edges then folded and hot glued the excess to the back.


After adding the little extra touch of buffalo check this ornament was complete and boy isnt she a beauty???


-PIN FOR LATER-


Love
Thank you!!
[…] Scrap Wood Buffalo Check Christmas Ornament […]
Comments are closed.