
I recently decided to create an easy Halloween place setting using a few crafty things I had around the house. After you see how ways it is to create this little spooky setting you will want to go scavenging your own stash…seriously! The best part, this entire setting took less that 5 minutes to curate! So whether you’re the last minute host or just want to flex those DIY muscles this one is for you!
Supplies
- Twigs from the yard
- raffia
- Spooky netting
- brown tags
- stamps
I didn’t actually photograph the step-by-step process of this look but I did do a short video tutorial that you can view below (Be sure to Subscribe to my new YouTube Channel)
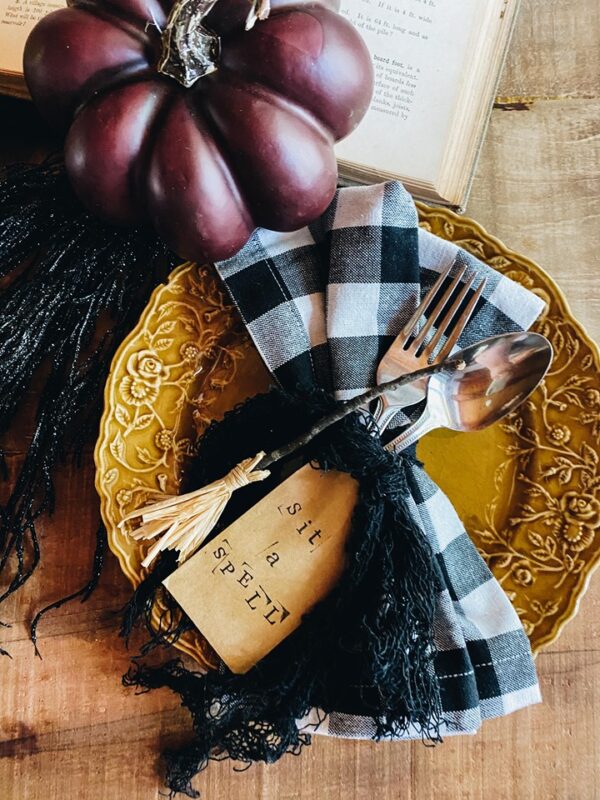
I started with the mini witches broom. I folded the raffia few times for a fuller look and secured with a longer piece of raffia. Feel free to secure the raffia with hot glue but I found that it really wasn’t necessary.
Next, I stamped the brown tags, using a witchy saying.
And lastly, I cut strips of the creepy Halloween netting I found at the dollar tree and used those at my “napkin rings”
It really was that easy, y’all. For this particular setting I styled ith with an old thrifted place and a buffalo check napkin I already had on hand. I challenge you to shop your own home to complete the look. Grab sticks from the yard and display in an old vase, use mismatched plates and wine glasses to add a touch of unexpected spookiness.
If you’re not quite ready for this Halloween place setting check out this beautiful fall table using the same shop your home method HERE
OR
Keep scrolling to see the video tutorial


I seriously love Halloween! From the crisp air to the hayrides and all the fun spookiness that comes with it. Are you a Halloween fan like me?


