
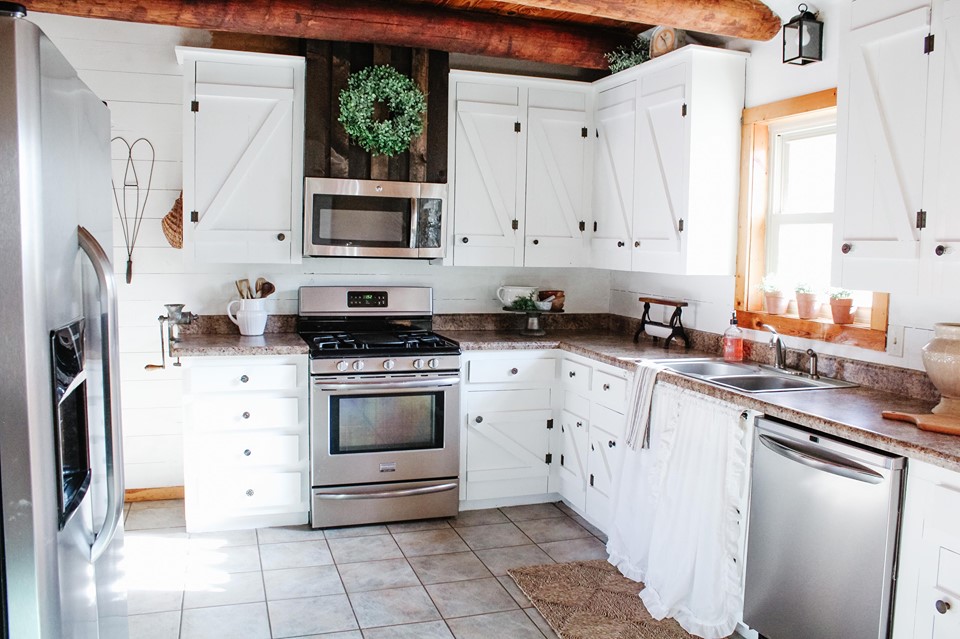
This idea blossomed when we decided to update our dark and dreary kitchen to an authentic farmhouse kitchen, which you can rad about HERE. I had always wanted a vent hood cover and since this is our forever home, I decided it was time to take the plunge.…except for one small problem. We had an overhead microwave mounted above the stove. There was no vent pipe redirecting the air, only the microwave and a small set of vents on the top.
I refused to let my dream of having a beautiful vent hood cover fade. My husband and I chewed over the idea for a while and we came up with this solution. This is less of a how-to tutorial because every siuation is different but more like an encouragement for you to think outside of the box when updating your spaces. Make your space work for you and fill it with things you love. Just so happens…I love this vent hood and it is here to stay.
This is what we were working with. Just a basic two door cabinet above an overhead mounted microwave. This look may be familiar to you, it is a very common characteristic in cabinetry. Luckliy, this simple fix can give your cabinets a facelift you may not have known you needed until now.

Measurements were taken and we decided to frame a box around the cabinets rather than remove them completely. Let me just say that the pictures of the actyal “process” are not the greatest. Just imagine a rectangle frame, the same size as the microwave, made with 1 inch peices, screwed to the ceiling. That’s the best way to describe what Josh is measuring for.

Of course our little helper had to take notes of Daddy’s measurements.

We checked for a nice snug fit for the boards across the front and measuring out the portion of the cabinets that needed to be notched out for the side boards. This was only a test for fit that’s why these boards aren’t stained yet. All I have to say is my boys sure know how to bring a project together for mama. And a side note, most of these boards came from our SCRAP PILE! Free is good for me!
Here, you can see a small portion of the frame at the top of the microwave/base of the boards. These are simply 1x2 in pieces secured to the original form of the cabine t(at the bottomof cabinet/top of microwave)) and the ceiling.

The next part of the process was notching out a small portion of the cabinet. We used a sawsall but truthfully a dremel tool would have been the better option for precision. But nontheless, this tool got the job done. The width was determined by the thickness of the boards we were using.

You can see here, that the cut wasn’t the cleanest. Luckily, at this point we had only primed the surface and I was able to go back and smooth out the rough edges with sandaper before applying the finish coats of paint.

We chose to stain it a nice dark, rich Espresso by Mixwax. This is probably my favorite shade of all time. I literally use it on everything!


Once the stain was dry, we brought the pieces inside and pieced the cuts together, attaching them to the frame with finish nails. We gave it a little something extra by attaching 1x4 boards over the seams for a finished and professional look.
It is really hard to photograph the sides of the hood due to the beams but boards were cut to fit on the top portion as well. Taking the extra steps to frame in the sides too is what gave this hood the authentic look I was looking for without going overboard on renovations.


-PIN THIS PROJECT-

https://www.anrdoezrs.net/links/9204394/type/dlg/https://www.hobbylobby.com/


