
Recently I had the opportunity to work on the most sentimental project I have ever done. If you have been following my page you know that occasionally I do custom work for people locally. The nature of the work can vary whether it’s repainting an old dresser or cutting down an old church pew it almost always involves a type of restoration.
It all started when a childhood friend of mine came to me with dried flowers from her daddy and nanny’s funerals. Some had been pressed while others were wilted in a shadow box. She was looking for a way to preserve the flowers for display in her home. Of course I said yes to the challenge immediately! I knew this would be one of the more delicate projects I had ever been a part of but I knew God had sent her to me on purpose and I needed to execute this well.
Based on the brittle condition of the flowers we decided that securing them between 2 panes of glass would be the best was to preserve the integrity of the flowers.

After finding the perfect window I took it to a local glass cutting company to have a pane custom cut to fit the shape and size of the window. They also helped me create a template to use for cutting the hard board that I planned to use for backing.

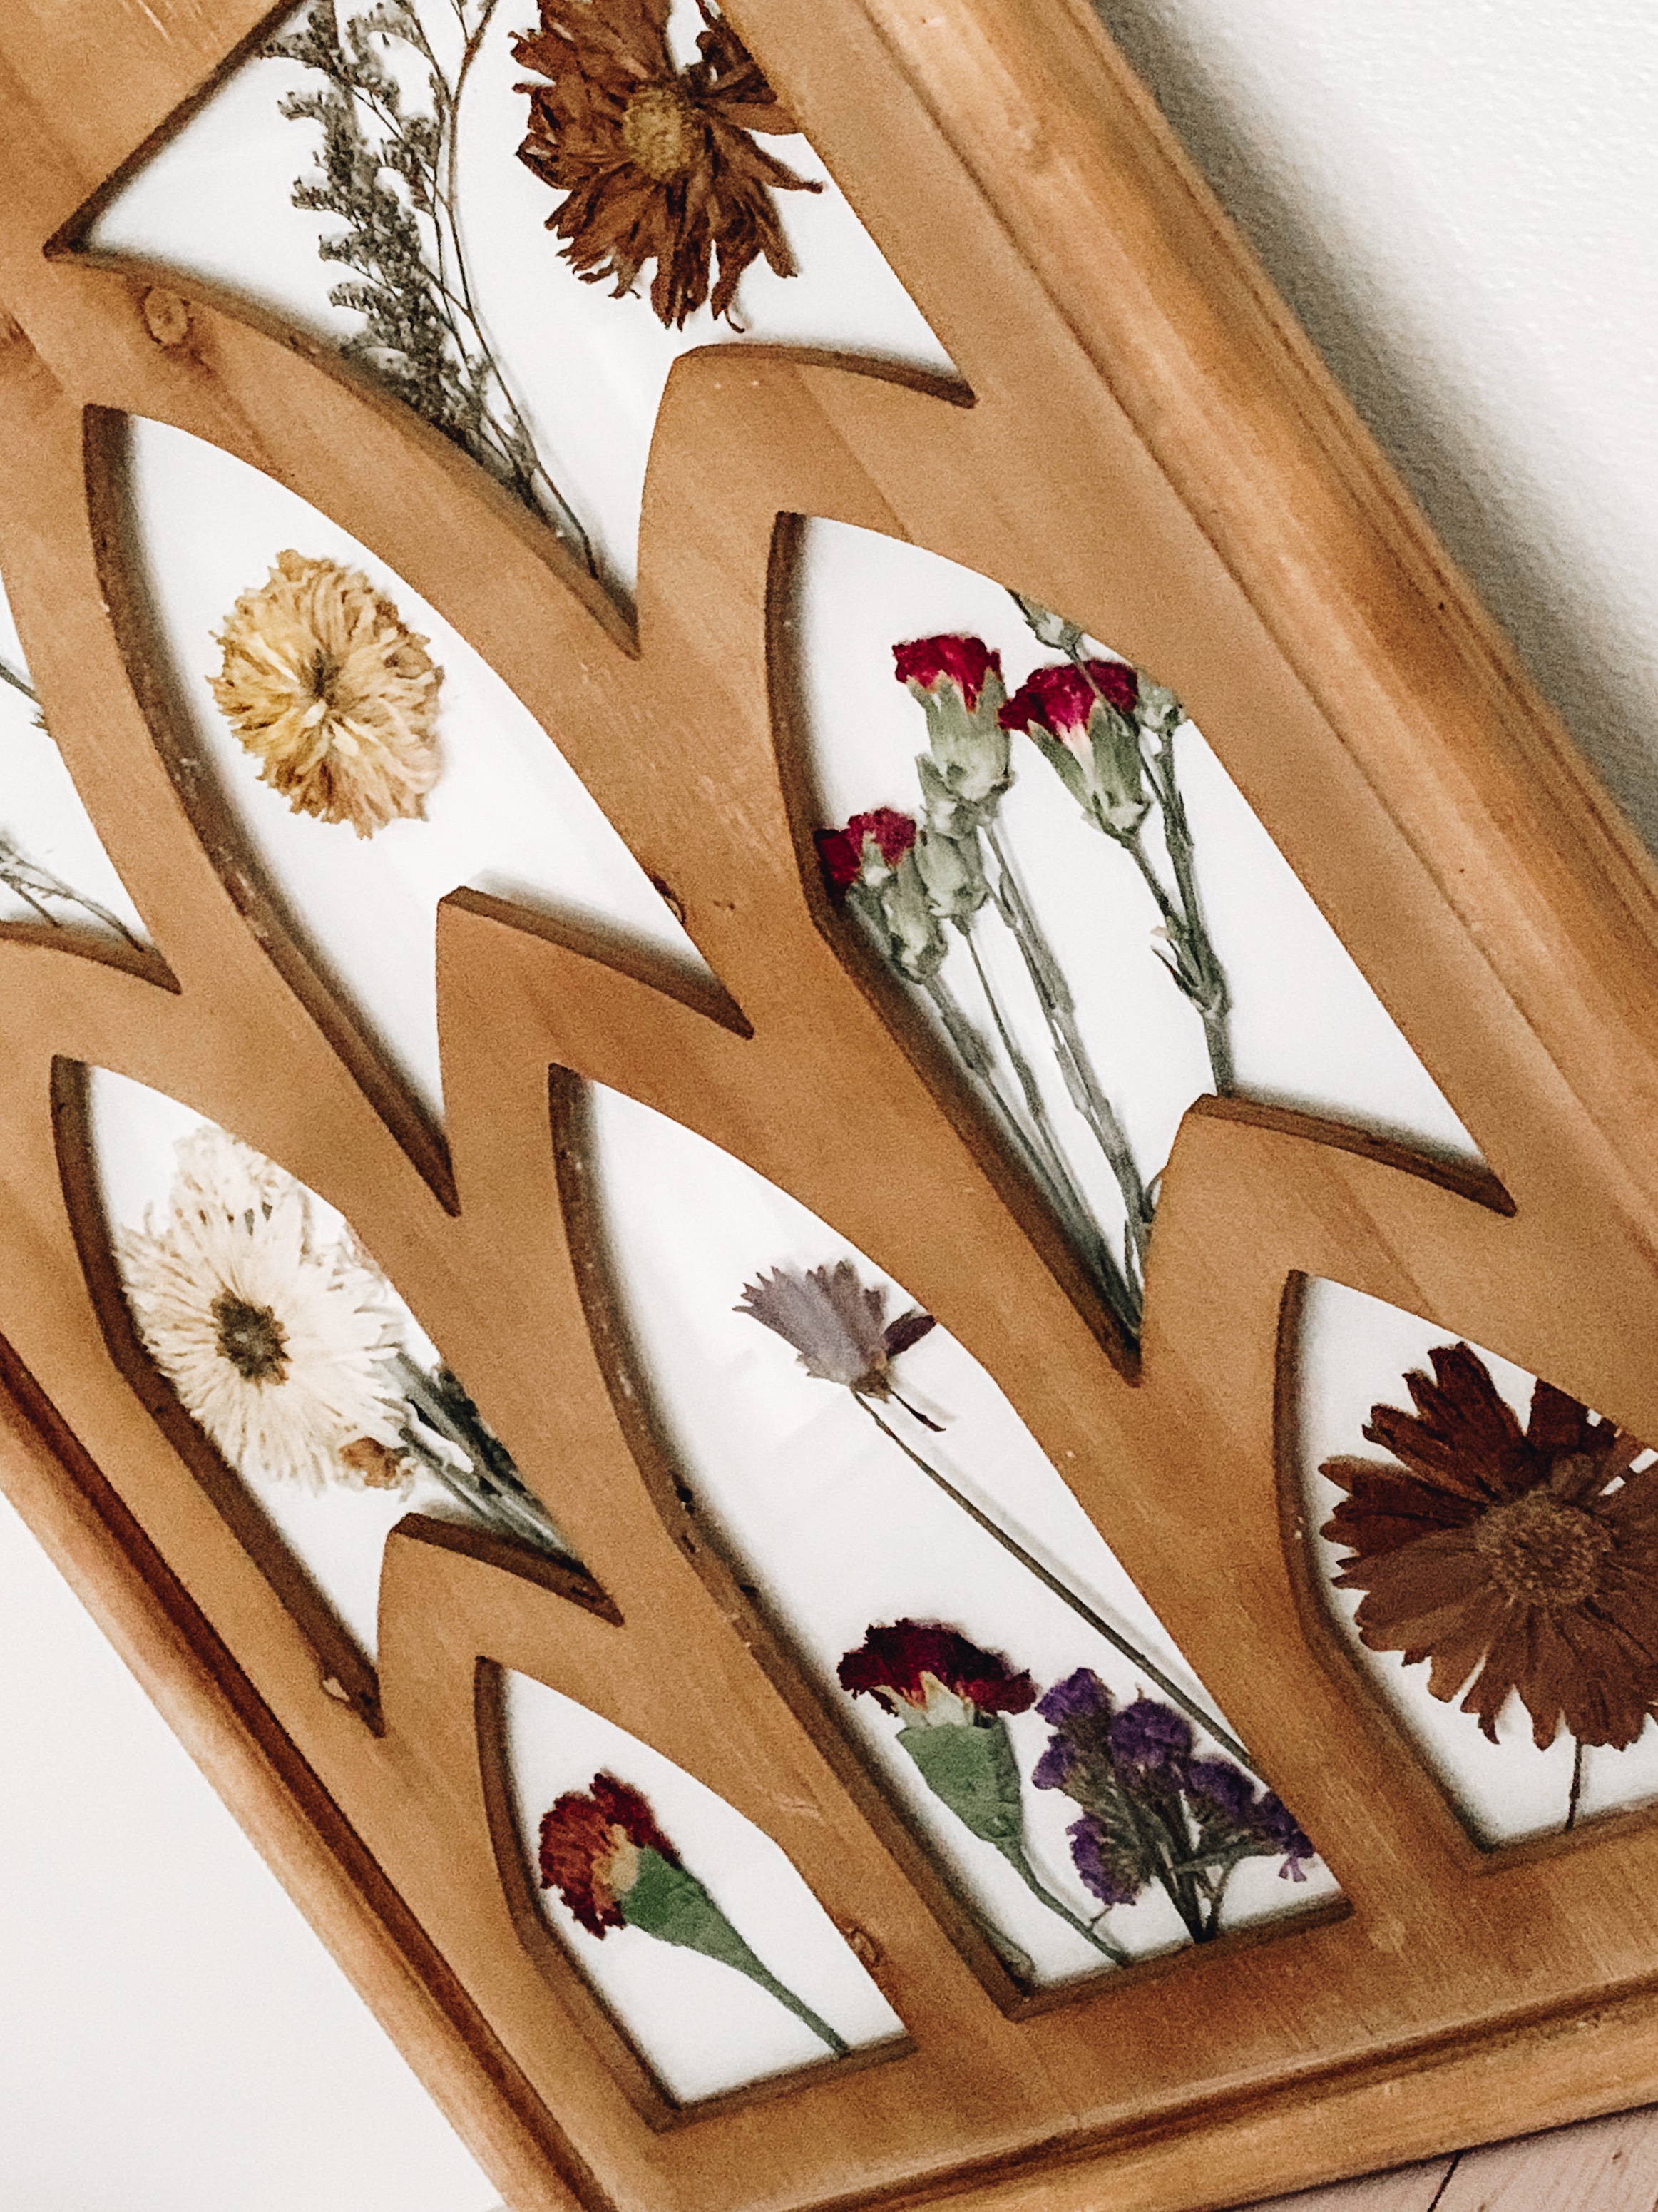
Once the glass and hard board backing were cut to size I was ready to begin the process of arranging the pressed flowers. This was probably the biggest challenge considering the brittle nature of the flowers. I was extra careful to preserve what I could from her original arrangements. As you can see here I was in the thinking process. I would lay them out, walk away for a bit, and come back to see if what I thought had looked good before had changed. There was really no method here other than creating balance.

My original plan after this point was to insert the hard board backing, secure with an industrial adhesive and call it a day. I found that some of the flowers were too thick for this method to secure the backing correctly. This is where the bar stock came in. As you can see in this photo, we used a 1/8 strip of bar stock,cut to size, and grinded until the edges were smooth. (Please ignore the condition of the walls in my garage)

Next, holes were drilled to size for the the wood screws I was using to secure the bar stock.


Once all the bars were ready for attachment I evenly spaced them across the back of the window. and attached them using 1/2 inch wood screws.

This was the final part of the process, aside from delivering this beauty to her new owner. She was thrilled with how it turned out!
“I am in awe of how beautiful this is! You’ve done such a wonderful job at preserving something that was so special to me. Seriously I am in tears, it’s so pretty.”
-Sarah W.


Beautiful and unique
Thank you so much. I thought so too!
Oh it’s gorgeous!!!
Thank you so much!
Comments are closed.