
Sooo, as most of you may already know we have been steadily working on converting an old dresser into a kitchen island. My number one goal out of this entire conversion process has been working toward capturing an old, just pulled out of a barn feel. I don’t know if that makes any sense to you but that is literally the phrase I have been using to describe my vision. Rusty hardware (that I also DIY’d HERE) , chippy paint…you name it. This has presented itself to be quite the challenge but I was eager to get this part of the project knocked out. After a couple snags along the way, late evening and working in between shipping orders and being a wife and mama I am happy to say we are nearing the finish line. At this point, we are so close I can almost taste it. Thank you from the bottom of my heart for sticking this one out til the end.
The journey to building this beautiful countertop began in a local Amish workshop about 5 minutes from my home. I wasn’t able to photograph the process of them actually cutting the boards but we did get the opportunity to make a good connection with them for future projects!

Josh hand selected each board. He chose a soft maple, which isnt soft at all, if you were wondering. This particular wood has beauitful flowing grains that set it apart. Once we brought the boards home, I sat out to sand down all of the hard straight lines. I did ask that they keep as many blemishes as possible for the sake of giving this piece some age. This is what Inwas working with. I wanted a 36 inches in depth, hence the one board in the center cut to size. I was okay with the one being different, it just added that much more character.

I failed to get a picture of the egdes straight from the wood shop. They were very crisp and clean and new looking. I wanted rounded and worn. All I had to do was sand each straight edge using this 60 grit sandpaper and my circular sander.

Need a sander? This is the one I use!

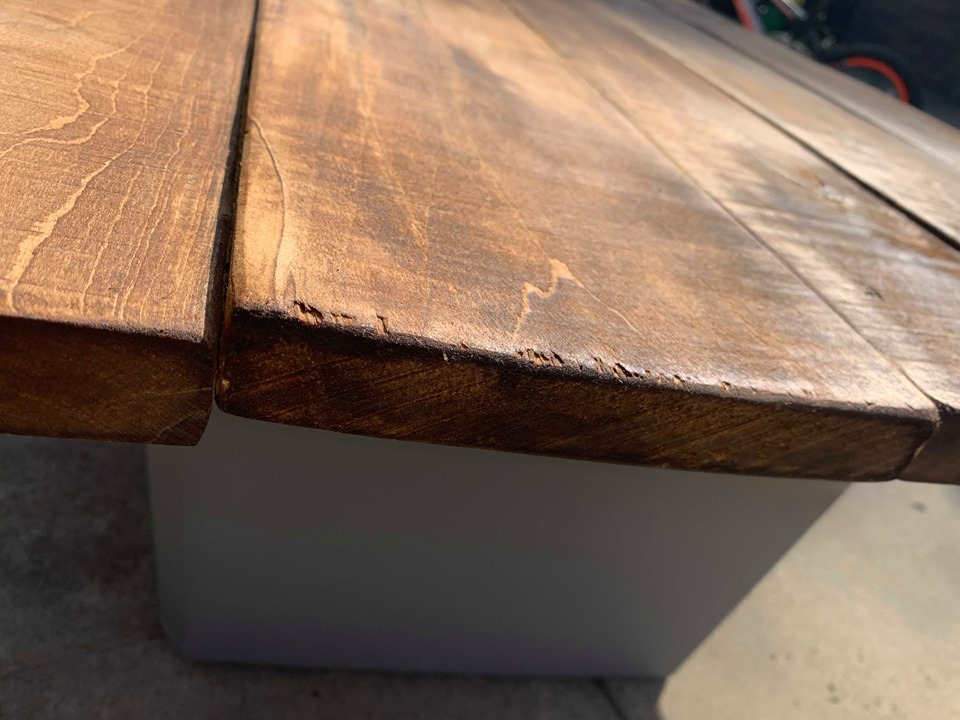
Here you can see the edges are nice and round. It may seem like a small unimportant detail but trust me, if you want the aged look you DON’T want to skip this step.

Next up..glue! I simply applied wood glue to each seam before clamping them nice and tight. DO youself a favor and make sure each piece is going to lay flush with the one beside it. Any sort of gap will result in the boards not touch, therefore making the glue worthless. I learned the hard way on this and accidently left a raw edge in the center. The result? My countertop broke…in half. Yeah.…let me help you avoid this mistake and double check that your seams are nice and tight before committing to the glue.


Once the glue has been applied and your seams are touching. Cinch both ends with clamps and allow your boards to set forat least 24 hours. Ideally, if you can perform this step inside the room where the wood will be used then that would be best. I also learned that it’s best to not place your wood on concrete while it’s acclimating. Concrete retains moisture, even when it feels dry, and can actually cause deformation in your wood.…mind blown. I had no idea. Like I said, learn from my mistakes.

After about 24 hours of curing, the top was ready for stain. I used a stain layering technique you can read about here.
Learn how to layer stain HERE


A few extra blemishes, courtesy of a pry bar, for good measure.

Seal your top with a water resistant sealer. I prefer Polycrilic because of its durability and it doesn’t having a yellowing effect like polyurathane.

PIN FOR LATER


