
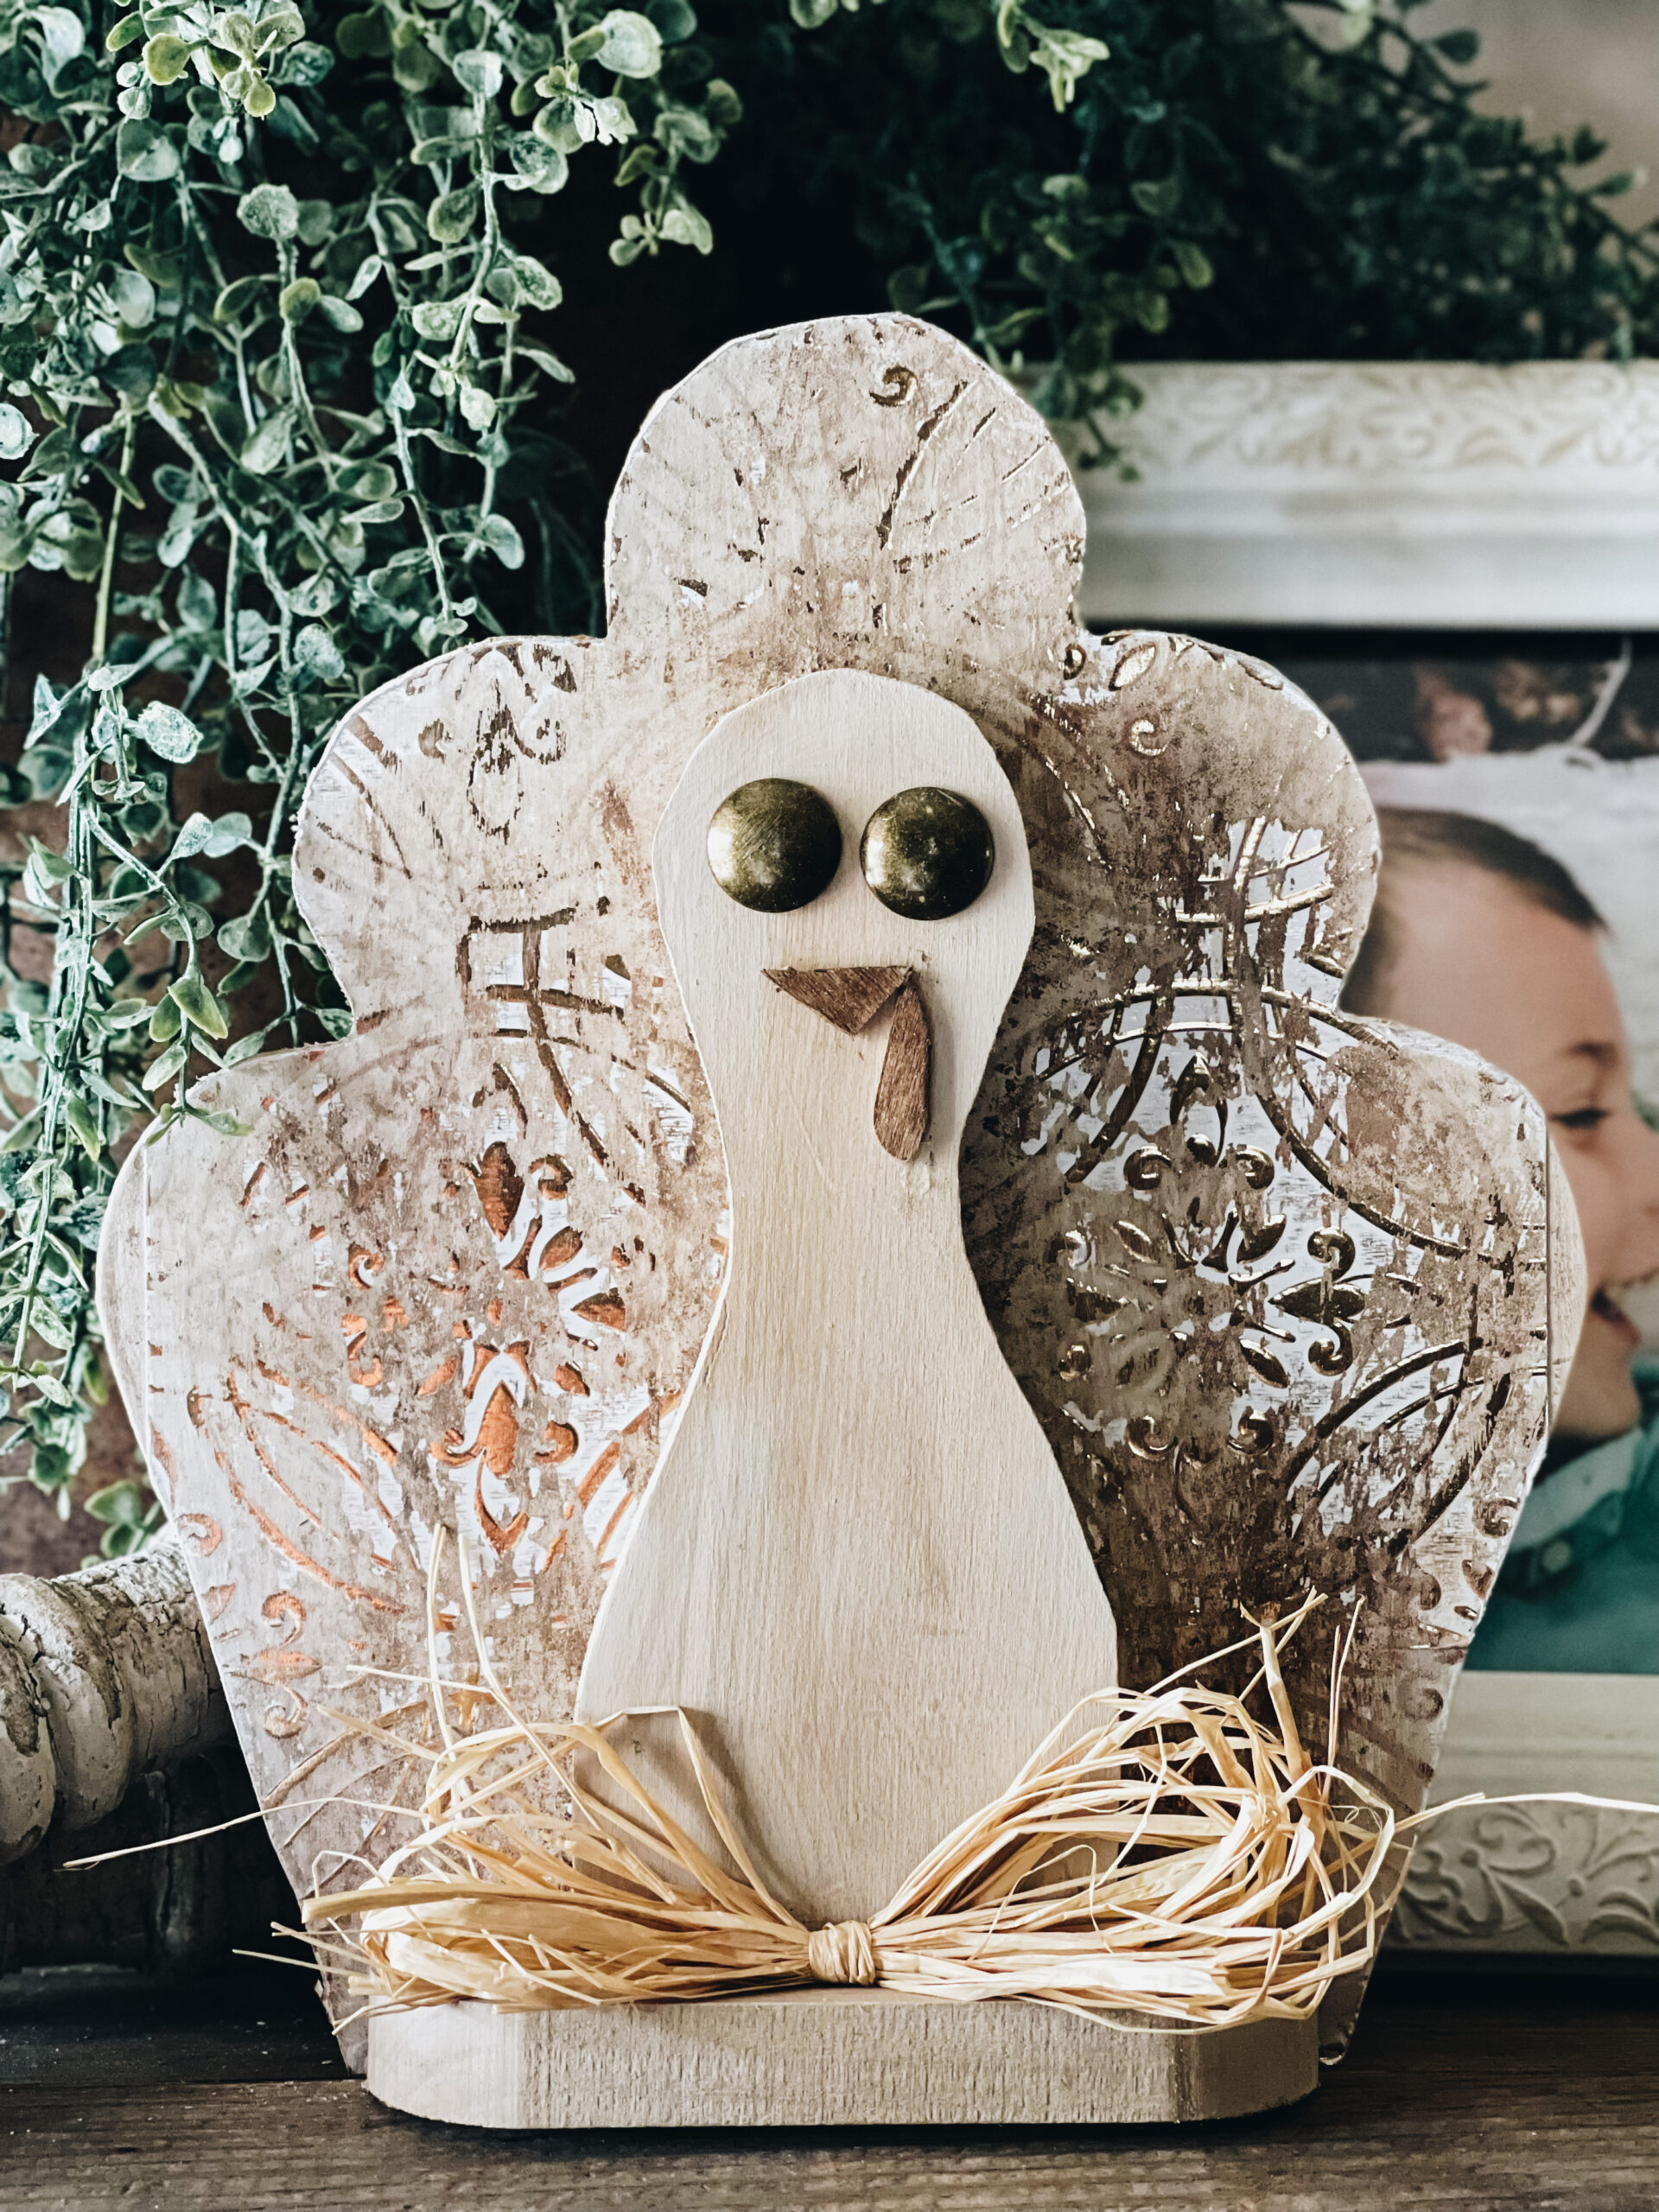
Every month I have the opportunity to craft with some of my favorite friends over on Facebook using the project from the Craft Wood Club. This month I sent the cutest turkey cutout and showed them how to texture it using a Dollar Tree Tile. What I love most about this monthly membership is the creative freedom with quality wood pieces it provides.

So whether you’re like me and using a Dollar Tree tile to add texture or you want to try a different technique, you have the perfect little wooden canvas to create with!


For starters I peeled away the backing on the 12x12 dollar tree tile and pressed the feather section of the turkey to the backing. I then traced the outline with a box blade to removed the excess tile.
Once that part was complete I applied a coat of Sandstone Waverly Chalk paint over the surface of the tile along with the other sections of the turkey wood cutout.


I then decided to antique the sandstone with a Waverly wax. Again, I did this to each of the 3 wood sections of this project. To be honest I didn’t love the result of the wax where I had previously applied the Dollar Tree tile. It came out looking blotchy and didn’t match the look I was going for in my head. Don’t you just cringe when that happens? But have no fear! The sanding block came to my rescue in this case and I was able to sand away some of the blotchy areas which revealed some of the gold foil of the tile itself.
Problem solved.

Once all the painted parts were dry I attached and assembled with hot glue. I embellished with upholstery tacks for eyes and cut tiny pieces of balsa wood (which were actually flat dominoes from the Dollar Tree) for the beak and beard…which I recently learned the technical term is called a wattle…who knew?

I mean come on! How stinkin precious this this little guy? I adore his neutral color and seeing that gold foil shine from the Dollar Tree tile shine through just a wee bit make this turkey ready for Thanksgiving!


